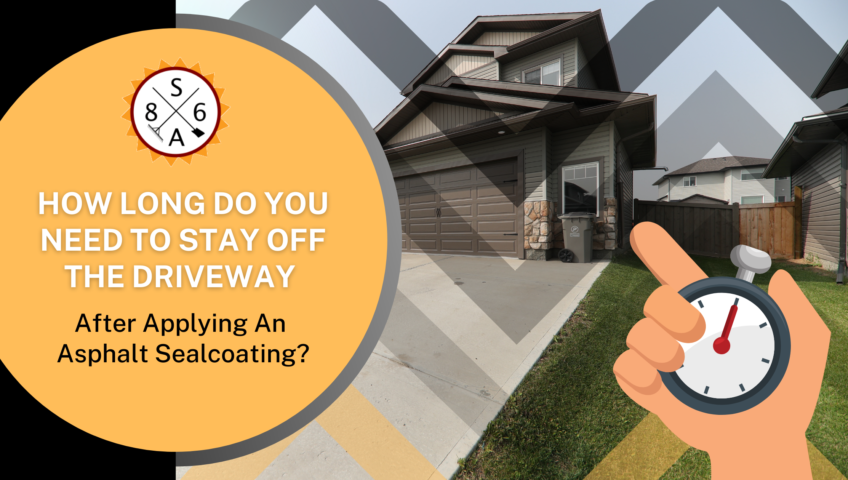
How Long Do You Need to Stay Off The Driveway After Applying An Asphalt Sealcoating?

One of the primary questions residential and commercial property owners want to know about applying a driveway sealcoat involves drying times. More specifically, property owners want to know how long after an asphalt sealcoat has been laid down can they resume usage.

While some resources offer advice such as “48 hours,” the answer is not that simple. A wide range of products can be employed, and each type of asphalt sealcoat dry time differs. It’s also important to keep in mind that seasonal temperatures and weather can impact how long you’ll need to stay off the driveway after applying a driveway sealcoat. For a more precise estimate, these are things property owners would be well-served to consider.

How Will Rain Effect an Asphalt Sealcoat?

Experienced asphalt contractors are careful to check local weather reports. Should Mother Nature deliver unexpected precipitation, an asphalt sealcoat can be rendered uneven or non-existent. Moisture from automatic sprinklers and other delivery systems can have the same negative effect on a newly coated surface. A driveway sealcoat typically must dry for at least 4-8 hours, depending on the product and conditions. Given the impact water can have on sealants, it’s advisable to stay off the driveway until a contractor can rectify the issue.

How Long Does A Driveway Sealcoat Take To Dry During Summer?

The best time to apply an asphalt sealcoat is during the warm-weather months. This timing should also be factored against regional rainy seasons. Some areas of the country experience fast-moving showers and severe weather during periods of high temperatures. That’s why local driveway sealcoat contractors pay special attention during those months.

That being said, it’s typically wise to take advantage of warm weather days with full sunlight. A sealcoat can dry within a few hours when applied in direct sunlight on a warm day. Depending on the product, property owners may be able to walk on their driveway as soon as 4 hours after the process has been completed. In terms of driving an automobile on the newly coated surface, the soonest advisable usage is about 24 hours. Most surfaces require a minimum of 48 hours before vehicles can drive over them without negatively impacting the work. However, if weather conditions are not optimal, it may be in your best interest to stay off the driveway for at least 72 hours.

When Can a Driveway Sealcoat Handle Everyday Use?

It’s essential for property owners to understand that a significant difference exists between walking, driving, and unfettered use. While a fast-drying asphalt sealcoat product can hasten light usage, most materials take much longer to fully cure. It’s not unusual for driveways to require upwards of 30 days before property owners enjoy carefree usage. That’s largely because asphalt sealcoat products may not have hardened enough to withstand oil and fuel staining. A product that has not necessarily completely cured could be negatively impacted by turning car or truck tires in place or hard impacts. The critical point is that home and business owners would be wise to take precautions during the first month to ensure the surface isn’t compromised.

Driveway Sealcoat Best Practices Make A Difference

For an asphalt sealcoat to effectively dry and cure, best practices must be observed. Temperatures should not generally fall below 50 degrees and driveways must be perfectly dry before applying products. Sunny days with low humidity maximize dry times and support effective curing. Never consider applying a driveway sealcoat if the forecast indicates a rain threat within 8-12 hours. If severe weather has been forecast, it may be prudent to postpone the work. Asphalt sealcoat best practices help shorten the time your driveway will be sidelined.

How to Sealcoat Edges

No matter why or where you are building a parking lot or sidewalk, sealcoating the edges is important for various reasons. By simply adding a thin liquid layer over the paved surfaces, sealcoating can help you maintain your parking lot or sidewalk for many years to come. That said, the following is an overview of the benefits of sealcoating as well as the steps you need to take to properly sealcoat your sidewalks and parking lots.

Benefits of Sealcoating

If you are wondering why you should sealcoat your sidewalks and parking lots, the most common benefits are as follows:

  • Prolongs Life Expectancy: One of the top benefits of sealcoating is that it helps to prolong the life expectancy of the asphalt pavement by providing a protective layer that helps to safeguard it against water, vehicle fluids, UV rays, and more. It also helps to fill in surface damage.
  • Saves Money: Given that sealcoating is a low-cost method, this helps you to save money over time on maintenance and other repairs.
  • Enhances Appearance: No matter if the asphalt is new or old, a fresh sealcoat will make your sidewalk or pavement look shiny and new.
  • Ice and Snow Protection: One special benefit of sealcoating is that it helps to accelerate the melting of ice and snow. Moreover, it also helps to protect the pavement from related issues such as water penetration, frost and/or snow damage.
  • Repair Minor Cracks and Other Wear and Tear: The process also allows you to repair minor cracks and other issues caused by everyday wear and tear.

How to Sealcoat

Now that we’ve gone over the benefits of sealcoating, let’s take a look at the steps you need to take to sealcoat your asphalt:

  1. Preparation: Before you can begin installing your sealcoat, you must prepare the area you are sealing. This means you will take the type to assess the condition of the area, clean the area with tools such as rotary brooms, commercial sweepers, and hand steel brooms. From there, you need to shut off nearby sources of water runoff, such as sprinkler systems.
  2. Repair: Once you have prepared the area, you must take the time to repair it. This involves filling cracks, repairing areas that have been seriously damaged, and repair things such as potholes.
  3. Application: After that, you will need to prepare the mixture to be applied to the asphalt. For longer-lasting results, apply two coats.
  4. Re-Striping: From there, you will need to re-stripe the pavement and/or apply any necessary markings that were covered during the process.
  5. Clean-Up: Lastly, you need to take the time to clean up and discard or store any trash and materials that are leftover.

Overall, if you are considering applying a sidewalk or parking lot sealcoat, you certainly should. Not only can it help to protect the pavement against ice and snow, extend the life of the pavement, help you save money on potentially costly repairs, and much more. While the process of applying a sealcoat is relatively easy, you should be sure that you have enough experience, knowledge, and stamina to complete such a job if you wish to do it yourself. Other than that, be sure to hire a qualified construction company you can trust.

What is the Typical Life Cycle of an Asphalt Parking Lot?

No matter how sturdily a structure is laid, it will eventually reach a time when it will require maintenance or replacement. The period it takes before reaching such an instant defines a structure’s lifecycle. Asphalt parking is one such structure, and if you own one, then you need to keep updated on essential aspects that define its lifecycle.

Various factors affect the lifecycle of an Asphalt parking lot. Environmental conditions, design and construction elements, water drainage means, frequency of maintenance, and significant of all, traffic load, are some of the critical aspects to the lifecycle of an Asphalt parking lot.

In this article, we shall focus specifically on the lifecycle of an asphalt parking lot as well as factors signifying a need for maintenance or replacement.

Asphalt Parking Lot’s Life Cycle

In overall, a standard asphalt parking lot can last for up to 25 years. However, this period can reduce or increase depending on asphalt maintenance regularity. But what happens during this lasting period?

Well, let’s have a look.

0 to 5 years: For the first five years since construction, your asphalt parking is still strong and probably shows little or no signs of damage. If anything, the surface might have insignificantly deformed while color discoloration might be visible, especially if it is extensively exposed to sunlight.

5 to 7 years: During this period, your parking lot starts experiencing minor cracks, thereby necessitating for maintenance services. Practices such as crack-sealing and seal-coating are necessary at this stage.

7 to 15 years: With proper maintenance practices during the previous phase, your parking might not undergo significant damages for the next 15 years. However, you should continually check for damages while ensuring necessary maintenance practices for prolonged endurance.

15 to 25 years: After 15 years of use, you should expect your Asphalt parking lot to have started developing visible cracks as well as considerable deformation. If such damages are significant, you might need to resurface your parking lot.

Over 25 years: beyond 25 years signifies the end of the parking’s life cycle. During this stage, it has undergone extensive damages and probably multiple repairs, which means it might no longer withhold the weight of your vehicle. If more repairs seem to be of no help, then you can reconstruct the entire structure.

Maintenance Practices Timing

Maintenance involves various activities including crack-sealing, seal-coating, and resurfacing, all which should be timely carried out. But how do you determine the best time for every maintenance practice?

Crack Sealing

Filling of small cracks in your parking lot should be done using a liquid concrete filler. Cracks to seal should be small, not exceeding half an inch in terms of width. You should schedule a crack sealing exercise every year to extend the lifecycle of your asphalt parking.

Seal coating

As one of the concrete maintenance activities, seal coating is meant to reduce concrete exposure from the effects of sunlight, spillages, water, and air oxidizers. Seal coating should be best carried out immediately after the crack sealing process or any other time beyond six months when damages start revealing.

Resurfacing

Extensive damages might eventually necessitate for resurfacing process. It involves adding a new asphalt layer on top of the existing one, a process also referred to as overlaying. This process should only happen after a decade of parking construction. You should also initiate it during favorable weather conditions, preferably during warm seasons.

Final Thoughts

Since timely maintenance is essential for your asphalt parking lot, you need to be observant on the emergence of an issue. If conditions such as cracks are unattended to, they may continually weaken the surface leading to a reduced timeline. Moreover, you should act on any issue you identify as soon as possible.


Asphalt Sealing: How to protect your parking lot from sun damage

Asphalt parking lots are great if you’re looking for something relatively affordable and easy to install, but keeping them pristine means doing what you can to block out the sun. During the hottest months of summer, the hot sun beating down on the asphalt can take quite a toll. If you’re looking for a way to better protect your asphalt parking lot, check out these five tips.

1. Basic coat

The easiest thing you can do if you want to protect your parking lot from sun damage is to apply a standard asphalt sealing coat. These sealing coats come in all sorts of different varieties, but they’re all designed to protect your parking lot from damage due to the sun, water or rock pitting. Keep in mind that the type of coat you choose will determine the quality of your seal, so it’s important to choose the right one if protection is a priority. This coat should be applied once a year.

2. Slurry Sealer

Standard asphalt sealing coats are good when it comes to providing some protection, but they don’t do a lot to change the actual texture of your parking lot. Slurry sealers are designed with lots of aggregate in the sealer, which means crackes and holes in your asphalt parking lot are filled while the asphalt is sealed to keep out UV rays and water. However, these seals require about 24 hours to dry and cure, so you need to have some time on your hands.

3. Microsurfacing

Microsurfacing is another popular choice when it comes to sealing asphalt parking lots. This is essentially a type of slurry seal that’s designed to set a lot quicker, which means you don’t have to keep traffic off your asphalt as long. This is an expensive option but a good one if you’re looking for a way to put a solid seal on a high-traffic area.

4. TRMSS

This isn’t the most popular type of sealer for residential and light commercial use, but tire rubber modified surface sealer is great if you need a strong seal for areas that consistently get heavy traffic. This rubberized sealer does a great job of replenishing the oils your asphalt parking lot needs while spreading aggregate to help fill cracks and small holes. TRMSS is most often used for things like streets and airport runways.

5. Fill Cracks

While your asphalt parking lot is always going to have some level of exposure to the sun, you can seriously cut down on the effect that exposure has by filling the cracks and holes in your parking lot regularly. Make sure you’re keeping an eye on your asphalt so you can be aware of damage right when it happens and get it fixed right away. While this won’t replace a good sealer, filling the cracks in your parking lot is crucial.

As great as asphalt parking lots are, they require a bit of upkeep if you really want to get the most out of them. The good news is, taking the time to seal and repair your parking lot when it’s needed will prevent damage from UV rays, water and rock pitting and will keep your lot looking great for years.

3 Winter Repairs You Should Be Making

Improving the lot around your business is important for economic growth. A number of things can go wrong in the winter with all the ice, snow, and rain, and there are repairs that businesses should be making to their lot. This will help prevent flooding and damage to the property, as well as increase customer safety.

Pothole Repair

Pothole repair is needed because it helps with improved curb appeal. If the parking lot is well maintained, it can convey to customers that you are a responsible business owner and value customer safety. Repairing potholes also saves money, since potholes that go unrepaired pose a risk for future damage that can be more expensive. Pothole repair is important for the safety of your customers and employees and can be a trip hazard for pedestrians. Businesses will be held liable for these injuries. Pothole repair can be difficult in the winter, but temporary repairs need to be made in order to ensure that drivers can get safely to the business. For temporary repairs, a cold mix asphalt should be used. This mix works especially well if the temperature is below the recommended level and it’s an emergency. All ice, moisture, and debris should be removed from the area before beginning the repair.

Catch Basin Repair

Catch basins and storm drains play an important role, especially in the winter with all the run off. Catch basins will catch and prevent contaminants from entering the drainage system. Without them, debris could enter the system and clog it, which will lead to some serious flooding and a negative effect on the property. If water pools in the lot, then the pooling on the asphalt can lead to the deterioration of the pavement. When water enters the joints it can cause the mortar to pop out and repairs are needed. Sometimes even cracks appear near the perimeter to allow more water to get in. Depending on the damages, repairs can extend from patching up asphalt around the perimeter to a complete structure repair.

Cracksealing

Winter is the perfect time for cracksealing because pavement expands and contracts with seasonal temperature changes. This means that joints and cracks are expanding when the pavement moves. Cracksealing is preventative winter road maintenance that is meant to extend the life of the pavement. It’s important to seal up cracks because cracks can allow for water and other materials, such as dirt, debris, and sand, to get into the pavement structure. These cracks will then accelerate the weakening and deterioration of the payment. With the proper seal cracking, and when properly executed, it can help extend the life of the payment from six months to four years. Before beginning any cracksealing, the area should be clear of any moisture, debris, vegetation, or dirt, in order for it to be the most effective. If using heat, be careful not the scorch the pavement and note that the sealant needs to be placed in the pavement before the crack cools to allow for it to adhere best. The entire crack should be filled and then leveled to make sure that the payment remains smooth. It’s important that any repair material or sealant is only applied only within the manufacturer’s recommended application temperature, otherwise it won’t work. More sealant isn’t always better. Too much can lead to problems when paving over. Cracksealing is important because it can buy time and help save money by delaying the expense of other major reconstructive work.