Asphalt Milling VS. Asphalt Resurfacing

Asphalt is the general term used to describe the material that makes up the majority of roads around the world.

It is a mixture of various sizes of rock and oil as a binder. The process of developing an asphalt mix and laying it down to form a road is complex. However, without this process, roads that have been damaged over years of use would not be replaced or upgraded with new asphalt. There are a number of steps to replacing or upgrading an asphalt road, and while it is very rare for a road to be completely removed down to the dirt and repaved, the process of asphalt resurfacing is an important task for any asphalt company.

Asphalt resurfacing is the term used to describe the process of removing a portion of a road, usually no more than an inch or two, and then laying down new asphalt. This is something that needs to be done periodically, especially as new mixes of asphalt are developed to better withstand damage. The process of resurfacing a road can be broken down into just a few steps. However, sometimes the processes involved in a resurfacing project may be confused with one another. Understanding the differences among these individual steps, and their importance to the entire process, will enable you to better grasp what is going on during the resurfacing of an asphalt road.

The first step of the process is asphalt milling.

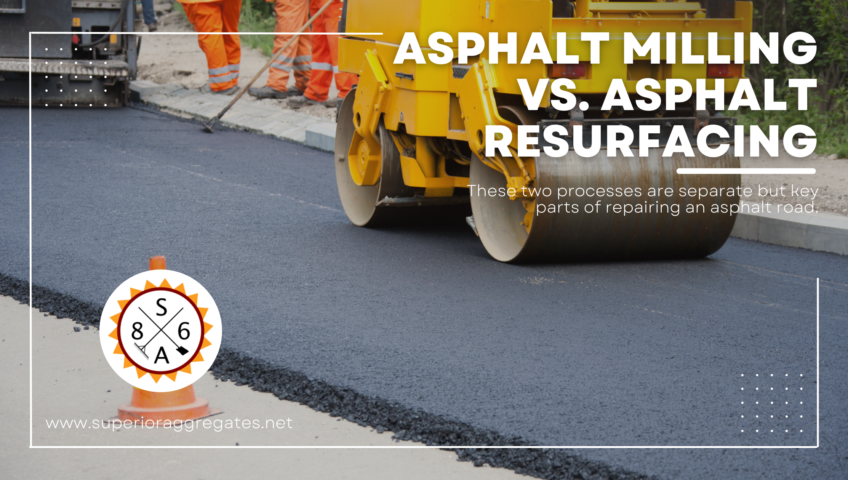
You may have seen milling machines working on a road. They are used to remove old asphalt, which is ground up and may be recycled. The milling process provides an asphalt company with something like a “blank canvas” to go back and repave with new asphalt. Milling can take place along a long stretch of a road, or in just a small area that needs to be repaired. Either way, the process takes off old and damaged asphalt, providing room for laying new asphalt without raising the height of the road.

After the milling process comes the process of asphalt resurfacing itself.

This is when the new pavement is laid down on top of the milled surface. The new mix is poured and rolled out to form a new surface to drive on. This process will involve a number of pieces of paving equipment, each of which plays an important role in ensuring that the new asphalt road meets the necessary standards.

As you can see, while the entire process may be referred to as asphalt resurfacing, the actual resurfacing is just one aspect of the process. It is important that the old asphalt be removed in order to provide a good place to start laying a new layer of asphalt. By using a milling machine to scrape off the top inch or two of asphalt, the new pavement can be laid without raising the level of the road. After the surface is prepared, the new asphalt can be laid. Sometimes, the laying of the new asphalt is what is referred to as the asphalt resurfacing process.

Understanding the difference between removing the asphalt, milling, and laying new asphalt, resurfacing, is important for knowing what is going on throughout the process of a paving project. And while some of the terms may be interchanged, these two processes are separate but key parts of repairing an asphalt road.

The Importance of Grading & Excavating Asphalt

It is always important to be prepared to learn something new, and when matters related to asphalt installation are concerned, there are a few things that many asphalt contractors, commercial property owners, homeowners, asphalt companies and even municipality employees may need to learn.

This article will give an easy and clear step-by-step overview of what a good quality asphalt installation requires.

Step 1: Demolition and Removal

The first thing you need to do is remove the existing surface, whether it’s concrete, asphalt or pavers.

  • For the required efficiency, demolition is done using heavy machinery that includes forklifts, front loaders, bobcats and large dump trucks when necessary.
  • The debris is then removed to make the place fresh for a new immaculate installation.

Step 2: Grading and Sloping

Technology plays an integral role in helping you get the perfect surface for the most appropriate water drainage.

  • Using automatic motor graders and laser-guided transits, ensure that you grade the surface you want paved to see to it that water will run off properly without creating unnecessary swamps.
  • When you get good water drainage for your asphalt, you will prevent future damage that includes cracks, water potholes and heaving. It will also add a lot of aesthetic appeal to your space.

Step 3: Prepare the Sub Base

The most integral part of your asphalt surface is the sub-base for the following reasons:

  • It provides a stable environment for maximum support of the new pavement.
  • It is a frost barrier and plays an integral role in reducing water damage because of thawing and freezing during winter.
  • The base stability, thickness, and compaction are very important steps when installing. If one thing goes wrong and the base is not properly compacted, the asphalt surface will not produce maximum durability.

Step 4: Undercutting, Sub Base Repair and Proof Roll

When the sub is well compacted and graded, you need to provide the next step, called the proof roll, to ensure that the underlying surface base is strong enough and ready to offer solid support to the new asphalt.

  • You can drive a heavily loaded quad axle dump truck row by row over the whole surface for the best results.
  • If the gravel happens to flex more than an inch under the truck’s weight, it means the base is not so well supported.

Step 5: Binder and Surface Course

Once you lay the sub, identify any soft areas and repair them, you can add the binder.

  • The binder is a large aggregate usually mixed with oil and, therefore, very durable and strong.
  • The binder layer is the ultimate strength of any asphalt surface.

Step 6: Install New Asphalt Surface

When you lay all the supportive structures of your new asphalt surface, you can add the top asphalt layer.

  • Surface asphalt is usually made of sand, oil and small aggregate.
  • The material combination provides a smooth and shiny surface when applied properly.

Step 7: Butt Transition and Joints

It is unusual to install an asphalt surface that does not connect to parking lots, existing driveways and busy parking lots. It is, therefore, important to do the following:

  • Give maximum attention to the butt joints and ensure that old asphalt and new asphalt are compacted.
  • Ensure that the area has proper water-run off.

Final Roll

Once the asphalt and the butt joints have been well laid, you can go ahead and make sure that the entire surface is compacted and smoothened by using a roller truck. This process ensures no small bumps and stones left poking through the new surface.

How To Treat Oil Spots On Asphalt Parking Lots Or Driveways

No one likes to see oil spots on the driveway or in a parking lot. They are not pleasant to see and challenging to clean. Oil spots on asphalt can do more than just look unattractive. They can cause extensive damage to the asphalt. However, there are some ways to treat it once there are oil spots on the asphalt.

Option #1 – Fresh Oil Spots

When there are new oil spots on your driveway or parking lot, these are the easiest ones to clean. A new oil spot on asphalt is a stain on the surface. The best way to clean this is to use detergent to scrub the oil spot. Once you have completely scrubbed it, you want to rinse it with water thoroughly. This will remove the oil and detergent. Once you have removed the oil spot, you want to add a seal coating layer to protect the asphalt.

If the oil spot is still wet, you can use kitty litter to soak up the oil. You can use an entire bag of kitty litter to cover the stain. Stomp on the kitty litter to help it absorb the oil. Leave the kitty litter on the stain overnight, then scoop up the kitty litter and dispose of the waste. If that does not work, you can use baking soda as that is great for absorbing oil. You can sprinkle the baking soda on the oil and scrub it with a stiff brush. After the baking soda has sat for 30 minutes, rinse it with a hose. You can also use a steam pressure washer to turn the oil into a liquid and whisk it away. This may be the most effective way to remove the oil.

Option #2 – Stains Seeped into Asphalt

When an oil stain sits on asphalt, it seeps into the asphalt. Once this happens, the asphalt material begins to fall apart. It requires more substantial treatment than detergent and water. Oil seeped into the asphalt dissolves the binder, and chunks will start to break off. Once this happens, the asphalt cracks and may make a slight depression in the asphalt. As long as pitting has not occurred in the asphalt, infrared hear can be used for asphalt repair. Once you have used infrared heat to repair the asphalt, you want to add a seal coating layer to protect the asphalt.

Option #3 – New Asphalt is Needed

The damage from the oil stains on the asphalt can be so extensive that they begin to soften the pavement, which means you need to start over again with new asphalt. This requires the impacted area to be cut out with a saw and a patch applied over the area. Once the patch is applied, you should add a seal coating layer to protect the asphalt. This is usually an inexpensive repair, but it is critical to avoid more significant concerns with potholes in the driveway or parking lot.

Option #4 – Prevent Asphalt Damage

The best way to protect your driveway or parking lot from damage is to use seal coating services. This process seals the asphalt so that items such as oil do not penetrate the surface and cause more damage.

THE LIFECYCLE OF ASPHALT

As with everything, asphalt has a beginning and an end. Understanding asphalt’s lifecycle comes down to understanding how and why asphalt eventually needs to be replaced. That replacement date ultimately comes down to several factors. So, what is asphalt’s lifecycle and what are some of the reasons it needs replacement?

Long before the asphalt is laid down, it gets blended. There are several different formulations and varying price ranges for each. Those formulations are made up of gravel, aggregates, sand, stones, and asphalt, which is itself a combination of oxygen, nitrogen, and sulfur. Lower priced asphalt will typically last from 5 to 15 or more years. More expensive asphalt can last up to 25 years or more. However, how the asphalt is laid plays a big role in how long it lasts.

The asphalt mixture is hot mixed and the site is prepared through a series of predetermined steps. First, the area is demolished and the debris is removed with heavy-duty equipment. Next, the area is prepared so that it can accommodate water drainage. The third step involves preparing the sub-base which is then compacted by equipment. The binder is then laid down which is large aggregate mixed with oil. Finally, the top layer of asphalt is added which provides a smooth surface finish.

Asphalt Maintenance

Properly maintained asphalt can last much longer than asphalt that’s left on its own. Proper asphalt repair includes cleaning oil stands, removing rocks and debris, fixing cracks with crack sealing, patching holes, and regularly applying seal-coating. Regular asphalt maintenance goes a long way to extending the asphalt’s life.

However, there are other factors that determine how long the asphalt lasts. One factor includes the amount of traffic the asphalt handles. The weight of that traffic is another factor. Therefore, a high-traffic industrial area where trucks and equipment are present will have a more compound effect on the asphalt than vehicles that weigh less.

The weather and environment are other factors. Extremely cold temperatures can crack the asphalt and the process of freezing and thawing can cause the asphalt to rise and buckle. High heat is also a problem. It can cause the asphalt to expand, thereby exposing soft spots that can easily become large holes. Here is a general breakdown of the lifecycle for asphalt in five separate stages.

Stage 1: 0-5 years

Freshly installed asphalt shouldn’t need any maintenance or upkeep during this initial stage aside from routine seasonal care and general tidying up.

Stage 2: 5-7 years

After the first five years, cracks begin to form in the asphalt and the freshly-paved luster starts to fade. It’s time for some initial maintenance!

Stage 3: 7-15 years

Once your asphalt starts reaching double digits in age, you’ll need to start paying closer attention to regular maintenance.

Stage 4: 15-25 years

This is typically the time in your asphalt’s life when major repairs start becoming more common.

Stage 5: 25 or more years

If your asphalt has made it this far, then congratulations! However, it’s more than likely that now is the time the asphalt has to be replaced.

It’s good practice to continually remove debris and oil stains regardless of which stage the asphalt is in. Doing this will protect your investment and ensure that you’re not forced to cover the costs of replacing the asphalt too early.

The Benefits of a Career in the Asphalt Industry

When you choose a career with an asphalt company, you become a leader in the construction industry. Think about all the miles of road that there are across the United States and how many of them are paved in asphalt. Millions of people rely on those roads to get them everywhere they need to be. This means that all those people depend on those working in the asphalt industry to keep the roads safe and functional. When a road is closed, it causes delays, frustration, and backups along adjacent roads. Those in the asphalt industry keep their communities moving. There are many benefits to having a career in the asphalt industry.

Job Security

Not many people can say they have job security these days. When you are looking for a career, security is a driving factor. Asphalt companies are not among the businesses fighting for survival. They are not going anywhere. Asphalt has been keeping our highways and roads functioning for just about 150 years. It is just as important now as when it was first used. The existing roads, parking lots, driveways, and other paved surfaces are always going to need maintenance and repair. In addition to existing roads, new roads are constantly created. Without a doubt, the asphalt industry provides job security.

Career Advancement

Each asphalt company has its own setup and style, but no matter which one you choose, there is going to be room for advancement. There are varying levels of knowledge, skill, and experience needed in construction, and asphalt is no different. Most organizations want you to contribute to the company in many different ways. There are many other positions within the asphalt industry, and not all of them are on the job touching the asphalt. There are plant managers, a foreman, laborers, road crew members, researchers, engineers, administration, and other support. Asphalt is not only found in construction. It is also found in civil engineering, technology, and research. Each person is dedicated to the safety and quality of the road system.

Hard-Working Partners

Everyone in the asphalt industry works hard and takes pride in their job. Workers in this industry are dedicated and hard working. To succeed in this industry, you must enjoy working with your hands and being involved in some aspect of construction. The entire team has a work ethic and lives by a higher standard for themselves and the community. Working in the asphalt industry offers a variety of extra perks. These include a well paying job that will last and is in the local area. There usually is not much travel involved with this job. You have the opportunity to contain education and growth into many different positions. You are not stuck forever out on the road pushing a broom. You are supporting and building the infrastructure for the community in which you live. You are using products that are sustainable for the environment. You are able to see the progress and the fruits of your labor on a regular basis.

There is no reason to delay looking for a job in the asphalt industry. You will not regret that decision.