Asphalt Pavement vs Concrete Pavement

Although the most obvious difference between asphalt pavement and concrete pavement is the appearance, there are many more differences that you may not notice at first sight. When deciding between the two surfaces, appearance is only one of the many factors to consider; continue reading to learn about the five main differences between asphalt and concrete: cost, lifespan, upkeep, sensitivity to temperature, and ease of repair.

Cost

When deciding between asphalt and concrete driveways, price is often the first consideration. Asphalt is typically cheaper, running $2-$5 per square foot on average. Concrete prices begin around $3-$9 per square foot. Many people who choose concrete driveways opt for customized designs, which can drive the price even higher.

Lifespan

While concrete may cost more initially, it has an average lifespan of about 30, and even up to 40 years, compared to an average lifespan of about 20 years for asphalt. This makes costs more comparable when thinking about the long term. This is something to consider when deciding between the two. If you will be in your home for 30-40 years, concrete may actually be more cost effective in the long run. Regardless of the pavement type, both require strategies for upkeep.

Upkeep

In order to keep asphalt pavement functioning to its highest potential, it needs to be re-sealed every few years. For asphalt pavement, sealing is strictly for function, and not for appearance, as the dark color of asphalt naturally hides stains and spills.

Concrete does not require as much upkeep, but it is more likely to stain or fade over time, so in order to maintain the appearance of concrete pavement, it can also be sealed.

Sensitivity to Temperature

If you’ve ever flown from north to south or vice versa, you’ve probably noticed that the majority of the driveways in the north are asphalt, while the majority of driveways in the south are concrete. This is because of how well each material withstands and reacts to temperature.

In extreme heat, asphalt can become gooey and even start to melt, and when it gets cold, it becomes much harder and more brittle. When asphalt continually goes through these temperature fluctuations, it is much more likely to crack.

Concrete, on the other hand, has a tendency to crack and buckle in extreme cold. Concrete also tends to be more popular in warmer climates because it doesn’t retain heat like asphalt does.

Ease of Repair

Even when you do everything you can to properly maintain a pavement surface, damages may still happen. When asphalt cracks or develops holes, it can be filled and sealed relatively easily. Because of the dark color, repairs are not very noticeable.

When repairing cracks in concrete, the repairs can be extremely obvious. Often, when there is a crack in concrete asphalt, the decision is made to replace the entire surface, rather than trying to repair and match the existing surface.

Conclusion

If you’re trying to decide between asphalt and concrete pavement, be sure to thoroughly research and think about your options. Your budget and the climate in which you live might be two of the biggest factors to take into consideration.

Asphalt Repairs Your Parking Lot May Need This Spring in Colorado

Has your asphalt driveway or parking lot gotten hammered this winter? You aren’t alone. However, with the right products and a few DIY skills, you may be able to repair the damage and prevent future issues.

Prevention Tips

The number one repair tip is to prevent damage before it starts. Some ideas here include:

  • Repair small cracks in the fall so they won’t worsen over the winter.
  • Clear debris away so it doesn’t scratch up the asphalt.
  • In colder months, regularly shoveling snow to minimize pools of standing water.

Repair Tips

When it comes to pavement, it’s always better to tackle problems sooner rather than later. Tiny cracks can become deep crags and potholes faster than you think. Here are four problems and what to do about them:

Is Your Asphalt Cracked?

There are several products you can get from local home repair centers for fixing asphalt cracks. Look for a two part kit that includes melt-in filler and cover mix that is troweled in. Follow the instructions on the box, but in general you will:

  1. Clean the cracked area well so the filler will adhere.
  2. Press the filler into place.
  3. Melt it in with a blowtorch.
  4. Trowel on a patch.
  5. Let it cure for a full 24 hours.  Rain will ruin the job.

Are There Pits in the Asphalt?

If you notice these where cars are parked, they could be from leaked motor oil and coolants. Smaller pits can be repaired with a patch in a similar process as with cracked asphalt. However, keep in mind that you’ll need to clear the oil out first. Use a product designed to cut oil, prime the area with oil stain primer, and then patch as above. If you still notice shallow pits, make a second pass with the patching to create a flat, sealed surface.

Do You Have Potholes?

These large pits can damage both ankles and vehicles, and if left untreated they will continue to grow. However, if you’re up for another trip to the hardware store, these are straightforward to patch. Get a bagged product and follow the instructions. The general procedure is:

  1. Clear the pothole of bigger chunks of debris
  2. Scoop or pour about two inches of asphalt patch into the hole.
  3. Use a shovel, tamping tool, or the blunt end of a firewood log to compact the material. The more compact you can get it, the better.
  4. Repeat steps 2-3 in two inch increments until it’s level.
  5. Add a small crown. This will compensate for the patch settling over time.
  6. Cure and seal.

Are There a Mix of Problems? Do You See Rippling or Sagging Asphalt?

If your driveway has more minor issues than you can easily count, it may be time for a full resurfacing. On the other hand, if you notice large slumped areas or ripples, that’s a worrying sign of possible damage to the surface under the asphalt. In both cases you’re looking at a big job to fix the situation.

It’s probably time to walk past your garage of tools and patch kits and head straight to your phone. Call in the pros. A professional repair company will know how to handle your damaged asphalt in a fast, efficient way and get things fixed right the first time around.

Asphalt Sealing: How to protect your parking lot from sun damage

Asphalt parking lots are great if you’re looking for something relatively affordable and easy to install, but keeping them pristine means doing what you can to block out the sun. During the hottest months of summer, the hot sun beating down on the asphalt can take quite a toll. If you’re looking for a way to better protect your asphalt parking lot, check out these five tips.

1. Basic coat

The easiest thing you can do if you want to protect your parking lot from sun damage is to apply a standard asphalt sealing coat. These sealing coats come in all sorts of different varieties, but they’re all designed to protect your parking lot from damage due to the sun, water or rock pitting. Keep in mind that the type of coat you choose will determine the quality of your seal, so it’s important to choose the right one if protection is a priority. This coat should be applied once a year.

2. Slurry Sealer

Standard asphalt sealing coats are good when it comes to providing some protection, but they don’t do a lot to change the actual texture of your parking lot. Slurry sealers are designed with lots of aggregate in the sealer, which means crackes and holes in your asphalt parking lot are filled while the asphalt is sealed to keep out UV rays and water. However, these seals require about 24 hours to dry and cure, so you need to have some time on your hands.

3. Microsurfacing

Microsurfacing is another popular choice when it comes to sealing asphalt parking lots. This is essentially a type of slurry seal that’s designed to set a lot quicker, which means you don’t have to keep traffic off your asphalt as long. This is an expensive option but a good one if you’re looking for a way to put a solid seal on a high-traffic area.

4. TRMSS

This isn’t the most popular type of sealer for residential and light commercial use, but tire rubber modified surface sealer is great if you need a strong seal for areas that consistently get heavy traffic. This rubberized sealer does a great job of replenishing the oils your asphalt parking lot needs while spreading aggregate to help fill cracks and small holes. TRMSS is most often used for things like streets and airport runways.

5. Fill Cracks

While your asphalt parking lot is always going to have some level of exposure to the sun, you can seriously cut down on the effect that exposure has by filling the cracks and holes in your parking lot regularly. Make sure you’re keeping an eye on your asphalt so you can be aware of damage right when it happens and get it fixed right away. While this won’t replace a good sealer, filling the cracks in your parking lot is crucial.

As great as asphalt parking lots are, they require a bit of upkeep if you really want to get the most out of them. The good news is, taking the time to seal and repair your parking lot when it’s needed will prevent damage from UV rays, water and rock pitting and will keep your lot looking great for years.

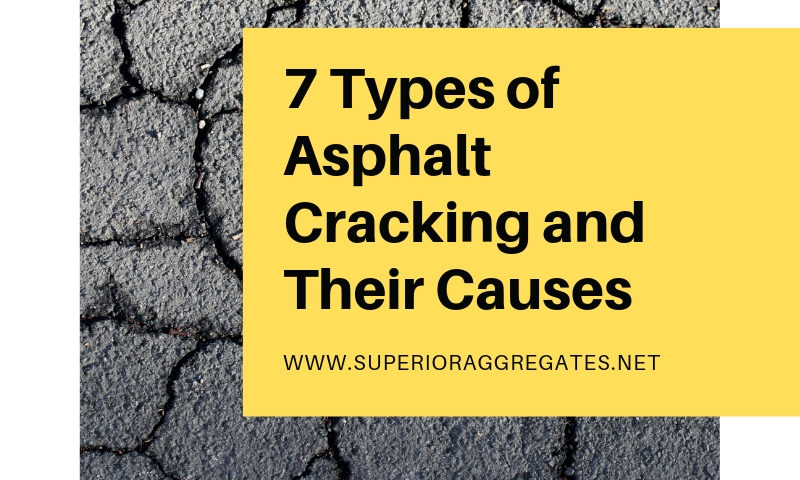
7 Types of Asphalt Cracking and Their Causes

There are numerous causes of asphalt cracking. These include harsh weather or climate conditions, drainage problems, incorrect or poor quality materials, and traffic loads. Proper identification of crack type and cause is vital. Each type of crack has distinct causes. Timely maintenance is critical to keep asphalt conditions from deteriorating further. Here are 7 types of asphalt cracking, the major reasons why the cracks occur, and the possible fixes for each.

1. Edge cracking

Edge cracks are longitudinal cracks within a few feet of one of the edges of the pavement. They can be caused by settlement of the underlying material, soil drying, or lack of lateral support. Possible contributors can be nearby trees or shrubs. These should be cleared away. Filling with asphalt emulsion slurry will often take care of this problem. Drainage may need improvement.

2. Slippage cracking

These cracks are crescent shaped. A number of factors can lead to slippage cracks. Non-adhesive materials, such as water or dirt between layers, can lead to poor bonding between the surface and material beneath. Low-strength or deficient asphalt mix is one possible factor. Usually the solution is to remove material around the crack until a layer with good bonding is reached. The upper area can then be patched.

3. Reflection cracking

Reflection cracking happens because of asphalt pavement overlays that have been placed over a pavement structure that has been cracked or jointed. There is then shifting or movement of the old pavement. These cracks or joints can reflect from that pavement to the surface. Crack sealant can sometimes fix low severity cracks. Pavement that is cracked more severely may need the layer replaced.

4. Transverse cracking

Cracks approximately perpendicular to the centerline are commonly known as transverse cracks. Transverse cracking may occur due to low temperature thermal cracking or because the asphalt grade is too hard for the particular climate conditions. These cracks are often caused by asphalt layer shrinkage. They are not load related but can be aggravated by heavy traffic. Generally, repairing this type crack calls for sealant or, if necessary, replacement with a new overlay.

5. Fatigue cracking

Fatigue cracks are sometimes called alligator cracking because they favor the skin of these reptiles. As the name fatigue cracking suggests, this deterioration is load related. It can be aggravated by deterioration of a weak base, subgrade, or surface. Poor drainage can be a factor. The distressed area material must be removed and replaced with the correct asphalt mix.

6. Block cracking

Block cracks resemble giant rectangles or squares in your pavement. Lack of sufficient moisture in the original application, or later on, is one possible cause. Extreme temperature cycles can cause an inability of the asphalt binder to contract or expand sufficiently as well. Traffic is not usually a factor. Small cracks can be sealed. Overlay replacement is the usual remedy for more severe block cracking.

7. Longitudinal cracking

Longitudinal cracks run paralleled to the pavement centerline. A number of factors could cause longitudinal cracking. There can be shrinkage of the asphalt. A joint could have been constructed poorly. Improper paver operation can be a cause. The surface in these cases will need to be resealed with proper adjustments made.

Asphalt crack repair is important. As you can see from the many causes for asphalt cracks, it is vital to identify the problem correctly. Untreated cracks get larger and can lead to potholes. Once the problem is identified, the appropriate remedy or fix can usually quickly and safely bring the asphalt back to its proper function.

5 Different Ways to Get the Best Value from your Concrete Contractor

Whether you’re looking for concrete poured for a parking area, patio, or other project, you want to be sure that you’re getting the best value. How? Look for experienced professionals who will respect your time and financial budget while still bringing their expert opinion. This may sound like a tall order, but you can pull it off in five straightforward ways:

1: Do Your Homework

Research contractors in the area to help you narrow down a potentially large field of experienced businesses. See if you can find online reviews or talk to references.

Once you move on to getting a quote from the top contenders, do a little more digging. Do they have experience with the specific job you have in mind? More importantly, do their qualifications check out?

Unfortunately, some unscrupulous companies exaggerate or invent qualifications that they haven’t earned. This could mean:

  • poor results that don’t hold up to the elements
  • features not up to code
  • an expensive headache as another contractor tries to fix the mess

2: Get On the Same Page

Once you’ve decided on a concrete contractor, make sure that the two of you are on the same page about the project. Explain clearly what you want and listen to the contractor’s expert recommendations. Discuss any concerns you may have, for instance with zoning laws or requirements for home insurance. Finally, read through the written contract itself. If there are any areas that you don’t understand, bring them up before you put your signature down.

3: Beware of Cutting Corners

The price tag for this job matters, but it’s not the only important factor. Watch out for contractors who trim costs by using low grade materials or rushing through steps in the pouring process. It’s also not a good idea to cut corners time-wise. Over the long term, rushed jobs tend to have poor results.

On a related note, be careful with concrete curing times. Don’t continue your project until that surface is completely cured. You could cause a lot of damage to the concrete itself.

4: Be Prepared to Compromise…

On your schedule, that is. Experienced, in-demand concrete contractors may have their workdays planned for weeks in advance. If they aren’t available for the day you were counting on, see if there’s another date that could work for you. It may be worthwhile to shuffle your renovation schedule around a bit.

You may also want to compromise on small details of your project. If your concrete contractor strongly advises that you adjust something, there’s probably a good reason. Remember that you hired them in part for their expertise. Most contractors genuinely want you to get the best possible result and enjoy your concrete features for years to come. They are your partners in this stage of the project, so hear them out and make your best judgment call.

5: … But Know When to Stick to Your Guns

Ultimately, you know what you’re looking for and what your budget looks like. Your contractor may suggest a variety of upsells. These could include stamping patterns into the concrete surface or some fancy new sealant. Extra features aren’t necessarily a bad idea. In fact, they could potentially raise the value of the property and increase the longevity of the concrete. However, if your budget or vision for the property doesn’t include them, put your foot down. Ultimately you have the last word.