7 Pavement Preservation Treatments for Your Asphalt Surface

Constructing an asphalt surface such as a driveway, parking lot, or basketball court is a significant financial investment, so it only makes sense to protect it. That means regular maintenance should be performed to preserve the integrity of your asphalt surface and extend its lifespan.

We’re here to help you get the most out of your asphalt surface. In this article, we’ll discuss 7 pavement preservation treatments for your asphalt surface.

1. Routine Maintenance

Routine maintenance is necessary to prevent damage and staining. Fuel and oil from vehicles, as well as leaves and debris, can lead to permanent stains on asphalt surfaces. Oil and fuel spills can also seep into the pavement, leading to cracking and other damage such as potholes. Rock and gravel can also harm the surface when they’re run over by cars.

Asphalt surfaces should be swept frequently, especially after storms, to remove dirt and debris. Car oil and fuel, meanwhile, should be cleaned immediately using a long-handled brush and a mixture of water and either powdered detergent, dish soap, or baking soda.

2. Sealcoating

Sealcoating is another great way to preserve the integrity of your driveway or asphalt surface and make it “pop” again. Many people wait too long to sealcoat surfaces, which can lead to premature wear and a faded, gray color. Consider sealcoating every two years.

The benefits include:

  • Prolonging the surface’s lifespan.
  • Preventing water from seeping beneath the surface and causing cracks and other damage.
  • Restoring the black color.
  • Protecting the surface from harmful UV rays.

3. Crack Sealing

Cracks are bound to sprout up on asphalt surfaces over time, and if you wait too long to fix them with a crack filling or crack sealing, they’ll keep spreading. Although this service can be done throughout the year, one of the best times to contact asphalt companies is after winter. The constant freeze-thaw cycle can wreak havoc on asphalt surfaces.

4. Patching

Like cracks, potholes are also a common enemy of asphalt and can form when water seeps into cracks, freezes, and expands. Potholes are not only an eyesore, but they can lead to trips and falls, and vehicle damage. Patching these areas is an extremely cost-effective solution to improving the appearance and safety of your asphalt surfaces, as well as extending their lifespan.

5. Overlays

Asphalt overlaying is a method of applying about two inches of asphalt over areas of the existing base layer that have deteriorated due to significant potholes, cracks, or uneven surfaces. An overlay can extend the life of your asphalt surface by as much as 15 years depending on its age.

6. Slurry Sealing

Slurry sealing is a type of sealcoating used to protect asphalt and add value to asphalt surfaces. While normal sealcoating uses liquid asphalt, slurry sealing contains water, aggregates, and asphalt emulsion. Slurry sealing is commonly applied every five to seven years on roads that have received severe deterioration due to traffic.

7. Microsurfacing

Microsurfacing is an asphalt maintenance technique that can extend the life of blacktop roadways by an average of five to seven years. It’s a third less expensive than repaving and is commonly used by local governments for roads. Microsurfacing is the process of using a mixture of aggregate, water, and asphalt emulsion and adding it to an existing surface. Microsurfacing doesn’t rely on water evaporation in the asphalt emulsion, and, instead, uses chemical additives that can harden quicker.

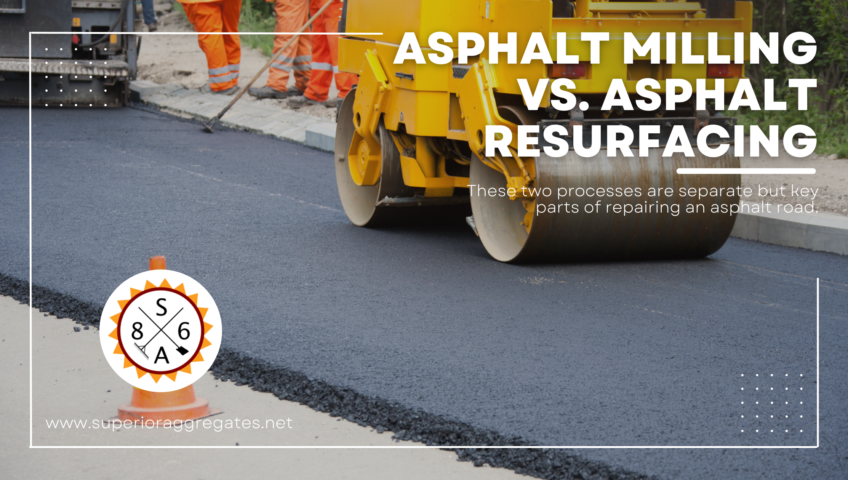
Asphalt Milling VS. Asphalt Resurfacing

Asphalt is the general term used to describe the material that makes up the majority of roads around the world.

It is a mixture of various sizes of rock and oil as a binder. The process of developing an asphalt mix and laying it down to form a road is complex. However, without this process, roads that have been damaged over years of use would not be replaced or upgraded with new asphalt. There are a number of steps to replacing or upgrading an asphalt road, and while it is very rare for a road to be completely removed down to the dirt and repaved, the process of asphalt resurfacing is an important task for any asphalt company.

Asphalt resurfacing is the term used to describe the process of removing a portion of a road, usually no more than an inch or two, and then laying down new asphalt. This is something that needs to be done periodically, especially as new mixes of asphalt are developed to better withstand damage. The process of resurfacing a road can be broken down into just a few steps. However, sometimes the processes involved in a resurfacing project may be confused with one another. Understanding the differences among these individual steps, and their importance to the entire process, will enable you to better grasp what is going on during the resurfacing of an asphalt road.

The first step of the process is asphalt milling.

You may have seen milling machines working on a road. They are used to remove old asphalt, which is ground up and may be recycled. The milling process provides an asphalt company with something like a “blank canvas” to go back and repave with new asphalt. Milling can take place along a long stretch of a road, or in just a small area that needs to be repaired. Either way, the process takes off old and damaged asphalt, providing room for laying new asphalt without raising the height of the road.

After the milling process comes the process of asphalt resurfacing itself.

This is when the new pavement is laid down on top of the milled surface. The new mix is poured and rolled out to form a new surface to drive on. This process will involve a number of pieces of paving equipment, each of which plays an important role in ensuring that the new asphalt road meets the necessary standards.

As you can see, while the entire process may be referred to as asphalt resurfacing, the actual resurfacing is just one aspect of the process. It is important that the old asphalt be removed in order to provide a good place to start laying a new layer of asphalt. By using a milling machine to scrape off the top inch or two of asphalt, the new pavement can be laid without raising the level of the road. After the surface is prepared, the new asphalt can be laid. Sometimes, the laying of the new asphalt is what is referred to as the asphalt resurfacing process.

Understanding the difference between removing the asphalt, milling, and laying new asphalt, resurfacing, is important for knowing what is going on throughout the process of a paving project. And while some of the terms may be interchanged, these two processes are separate but key parts of repairing an asphalt road.

4 Ways To Save Money With Minor Asphalt Repairs

For asphalt driveways or parking lots, leaving cracks and holes unrepaired can make the asphalt susceptible to crumbling and erosion, resulting in issues that require costlier repairs down the line. To save money on asphalt repairs now and in the future, try these four asphalt repairs for minor problems.


Make Minor Repairs

Probably the most common minor asphalt repair is for a pothole. For small potholes, prepare the area by clearing it of rocks and vegetation, then washing it. Make sure there is no standing water in the hole or cracks before you begin.

After preparing the area, you can start filling the pothole with a pothole patch. Cover the area until it stands at about 1 and ½ inches above the surface of the surrounding asphalt, then tamp it down with a tamper, or drive over a piece of plywood set over the top.

Tamp the patch down until it is level with the rest of the area and very compact. When the area is dry, you can then use a hand grinder to make the edge of the new asphalt flush with the old, or, while it is still drying, you can use crack repair around the edge, blending with a spreader.

Before sealing the new pavement, do not turn on this spot for 2 to 3 weeks.


Drain Problems

Due to erosion and standing water, asphalt around the drains may begin cracking or deteriorating over time or after a freeze.

To repair minor cracks and chips, mark a square around the drain with marking paint. With a pickaxe, break apart the asphalt in the square and remove the debris. Note that if the foundation underneath the asphalt is compromised, this is no longer a minor repair.

Using a pothole patch, fill the area around the drain with the patch, tamping it down every two inches until it is level with the rest of the surface. You can blend this patch with a grinder or crack repair before sealing the surface.


Crocodile Cracks

These kinds of cracks appear due to repeated pressure that can’t be supported by the foundation. Water seeping into the cracks may worsen them.

To repair minor crocodile cracks, clean the area of rocks and debris with a tough broom and make sure there are no loose stones nearby to compromise the fix.

Using Gator-Patch or another brand of crack repair, apply the fix to the surface and use a squeegee or spreader to smooth out the patch into a thin layer. Work the material into the cracks by changing directions.

Let it cure before applying the second coat and the seal coat.


Chemical Spills or Stains

Whether from oil spills or other harsh chemicals, asphalt can become stained. For a small stain or spill, begin by drying up any active liquid by spreading kitty litter over the top, stomping it down, and letting it sit overnight.

The next day, sweep up the kitty litter and dispose of it. Then, saturate the area with Dawn dish soap and scrub it into the spot with a tough brush or broom. After scrubbing it into the pavement, wash the area clean with the hose. Repeat as necessary.

How Long Do You Need to Stay Off The Driveway After Applying An Asphalt Sealcoating?

One of the primary questions residential and commercial property owners want to know about applying a driveway sealcoat involves drying times. More specifically, property owners want to know how long after an asphalt sealcoat has been laid down can they resume usage.

While some resources offer advice such as “48 hours,” the answer is not that simple. A wide range of products can be employed, and each type of asphalt sealcoat dry time differs. It’s also important to keep in mind that seasonal temperatures and weather can impact how long you’ll need to stay off the driveway after applying a driveway sealcoat. For a more precise estimate, these are things property owners would be well-served to consider.

How Will Rain Effect an Asphalt Sealcoat?

Experienced asphalt contractors are careful to check local weather reports. Should Mother Nature deliver unexpected precipitation, an asphalt sealcoat can be rendered uneven or non-existent. Moisture from automatic sprinklers and other delivery systems can have the same negative effect on a newly coated surface. A driveway sealcoat typically must dry for at least 4-8 hours, depending on the product and conditions. Given the impact water can have on sealants, it’s advisable to stay off the driveway until a contractor can rectify the issue.

How Long Does A Driveway Sealcoat Take To Dry During Summer?

The best time to apply an asphalt sealcoat is during the warm-weather months. This timing should also be factored against regional rainy seasons. Some areas of the country experience fast-moving showers and severe weather during periods of high temperatures. That’s why local driveway sealcoat contractors pay special attention during those months.

That being said, it’s typically wise to take advantage of warm weather days with full sunlight. A sealcoat can dry within a few hours when applied in direct sunlight on a warm day. Depending on the product, property owners may be able to walk on their driveway as soon as 4 hours after the process has been completed. In terms of driving an automobile on the newly coated surface, the soonest advisable usage is about 24 hours. Most surfaces require a minimum of 48 hours before vehicles can drive over them without negatively impacting the work. However, if weather conditions are not optimal, it may be in your best interest to stay off the driveway for at least 72 hours.

When Can a Driveway Sealcoat Handle Everyday Use?

It’s essential for property owners to understand that a significant difference exists between walking, driving, and unfettered use. While a fast-drying asphalt sealcoat product can hasten light usage, most materials take much longer to fully cure. It’s not unusual for driveways to require upwards of 30 days before property owners enjoy carefree usage. That’s largely because asphalt sealcoat products may not have hardened enough to withstand oil and fuel staining. A product that has not necessarily completely cured could be negatively impacted by turning car or truck tires in place or hard impacts. The critical point is that home and business owners would be wise to take precautions during the first month to ensure the surface isn’t compromised.

Driveway Sealcoat Best Practices Make A Difference

For an asphalt sealcoat to effectively dry and cure, best practices must be observed. Temperatures should not generally fall below 50 degrees and driveways must be perfectly dry before applying products. Sunny days with low humidity maximize dry times and support effective curing. Never consider applying a driveway sealcoat if the forecast indicates a rain threat within 8-12 hours. If severe weather has been forecast, it may be prudent to postpone the work. Asphalt sealcoat best practices help shorten the time your driveway will be sidelined.

Timing, Materials, and Labor Determine Asphalt Crack Sealing Project Costs

No property owner wants to unnecessarily spend more money than necessary when hiring a professional to perform asphalt maintenance. Driveways and parking areas typically require asphalt crack repair every 1-3 years to keep them looking pristine and functioning properly. That being said, the average residential or commercial property owner does not have expertise in asphalt maintenance and repair costs.

Knowing the telltale signs that your surface requires prompt asphalt crack repair treatment and care can be somewhat murky. But by knowing when to reach out to a contractor and how pricing works, property owners can make informed decisions. If you believe your driveway or parking lot may need asphalt maintenance and repair, these are things to consider.

What Property Owners Need to Know About Surface Preparation

It’s not uncommon for everyday people to wait too long to hire a contractor. On the other side of the coin, some property owners pay for asphalt maintenance and repairs prematurely. Recognizing the signs, and getting the timing right, can save property owners money. If you notice any of the following, consider getting a quote.

  • Small cracks seem to be spreading.
  • Stone coloration shows through sealant.
  • Small potholes or depressions appear.

The cost of asphalt crack repair and will largely be driven by the percentage of the defects. Property owners shouldn’t allow cracks to cover more than 30 percent of the driveway and never wait until they have separated to ¼ inch in width. Dealing with this normal reaction to severe heat expansion and cold-weather contraction typically calls for routine asphalt maintenance. This may involve workers clearing away loose debris, cleaning cracks, applying filler before sealants. It’s crucial to make repairs and not allow excessive cracking and damage can shorten the life of a driveway or parking area.

Crack Sealing Material Drives Asphalt Maintenance Costs

The cost of sealing an asphalt surface is significantly less expensive than having to repave it. Asphalt crack repair filler and sealants can run less than $1 per square foot of materials, depending on the region. These costs usually increase year-over-year, and issues such as materials shortages and inflation can cause unexpected spikes in price. But all things being equal, the sealants used for asphalt crack repair are generally nominal. Commonly used material may include the following.

  • Asphalt Polymer Emulsion: This eco-friendly material offers reduced application odors. However, it may offer lower protection against oil and gasoline staining.
  • Coal Tar: This most widely used and cost-effective asphalt maintenance material, it provides significant staining protection.
  • Acrylic: Comprised of acrylic and polymers, this option offers sound resistance to staining and remains environmentally friendly. It does rank among the more expensive materials used for asphalt maintenance and repair.

Property owners that may be impacted by downtime sometimes employ fast-drying asphalt sealant materials. Some products can allow foot traffic to resume in a matter of hours, depending on weather and surface conditions. These materials also offer opportunities for automobile traffic sooner as well. However, the downside involves resealing more frequently.

Manpower Cost of Asphalt Maintenance and Crack Repair

It’s not uncommon for asphalt surface contractors to charge property owners based on square footage, over and against the estimated manual labor involved in surface preparation and material applications. Construction professionals with the knowledge and experience to make lasting repairs are in high demand, and workers typically earn the prevailing wages of a specific area. However, the relatively low cost of hiring professionals to make crack repairs usually outweighs DIY struggles and the high price of repaving.