6 Common Myths About Concrete

Concrete is that all-important material so critical to large-scale industrial, commercial, and residential construction projects. In fact, aside from water, no other material is used more than concrete. Its wide range of uses means it’s the preferred material for concrete companies when erecting standing structures like bridges and buildings.

However, despite how much it’s used, there are some common misconceptions about this universally-adopted material. To clear the air, here are 6 common myths about concrete debunked.

1. Concrete is always a gray color.

While concrete initially has a gray color, it doesn’t necessarily mean that gray will be the final color. There are multiple additives and mineral colors that can be blended into the concrete mixture long before it’s dried. These additives can change the color of the concrete once hardened. This is ideal for residential and commercial projects where maintaining an aesthetic is critical.

2. You can use acid to strip a concrete sealant.

This is perhaps the most common misconception and it’s a dangerous one. Acid should never be used to strip concrete sealant, no matter what the reason. Acid’s corrosive properties can seriously damage the concrete’s integrity and allow water to permeate throughout the concrete. The best solution is to avoid acid altogether and use a solvent or sealant remover.

3. Concrete and cement are the same thing.

No, concrete and cement are not the same. Cement is an ingredient in concrete. Cement is mixed with water, sand, gravel, and other aggregates and additives when making concrete. There are very few applications where cement is used on its own. Cement is a dry powder that acts as a binder for all the additives, water, and aggregates in order to make concrete harden.

4. The higher the compressive strength, the more durable the concrete.

Strength and durability are not the same. Concrete’s compressive strength can vary from a low of 2,500 psi to a high of 10,000 psi. However, strength refers to how much load/weight the concrete can withstand. Durability refers to how long the concrete can maintain that load/weight without degradation (breaking down).

Several conditions can affect the concrete’s durability such as freeze-thaw cycles, corrosion, cracking, and sulfate or chemical reactions. The best way to maintain concrete’s durability is by using a top-notch sealant that helps to keep water and other substances from seeping inside and degrading the concrete.

5. Concrete is impermeable.

Actually, concrete is not impermeable. Concrete is actually porous, which means water, fumes and noxious liquids can pass through the top layer of the concrete relatively easily. This can take anywhere from a day, to a month, or even several years. This is why using a high-quality sealant is so important to protect the concrete from the outside elements.

6. You can lay concrete any time of year.

Unfortunately, you simply cannot lay concrete any time of the year or under all conditions. Extreme weather conditions affect how concrete hardens. Below freezing or excessively hot temperatures will prevent the concrete mixture from properly drying.

Concrete installation shouldn’t be done in the extremely cold winter months or the high heat of summer. Instead, spring and fall are the best seasons for mixing and hardening concrete.

Interested in a proactive, customer-centric partner for your next construction project? If so, contact us now.

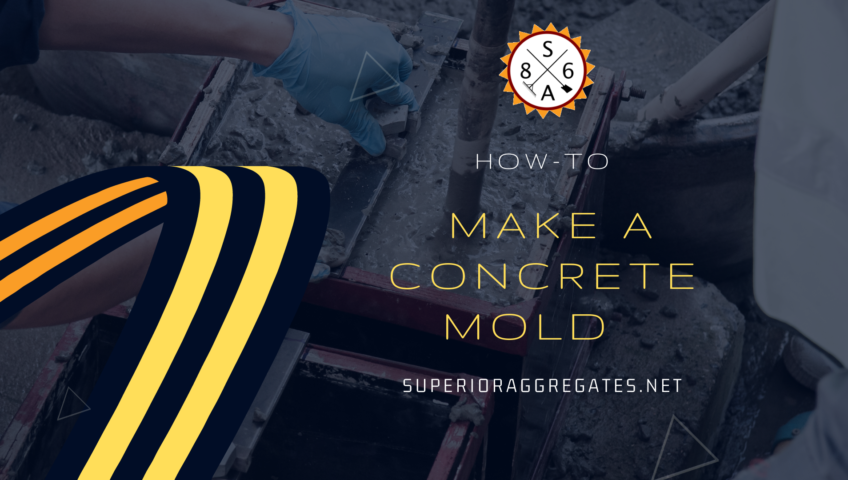
How to Make a Concrete Mold

Are you interested in creating a concrete mold by yourself? You need to make sure that you know how to do this safely. Furthermore, you also have to have the right materials. What are the steps that you need to follow if you want to successfully build a concrete mold? There are several steps to note.

Gather the Right Materials

First, you need to gather the right materials. You will need panels to create the mold, drywall screws, silicone caulk, bar clamps, ball bearing, a cordless drill, a circular saw, and a caulking gun. You will probably also want to wear latex gloves during this process.

Step 1: Cut the Panels

First, you have to cut the panel to the right size. A lot of people use a melamine board. If you would like to minimize chipping as you are going through the board, use a fine-tooth saw blade. Then, set the depth to just below the depth of the saw cut. Usually, this is about ⅞ of an inch.

Step 2: Clamp the Longer Side Walls to the Base of the Mold

Next, take the panels and lay them on a work surface. Place the longer walls on the edges. Hold them in place using the bar clamps.

Step 3: Drill the Pilot Holes

Once you are confident that the clamps are holding the board and place, drill several pilot holes spaced equal distances apart. Then, place the drywall screws through these holes. 1-inch drywall screws tend to work the best. Make sure that every screw is seated firmly. That way, the walls are drawn tight against the base. This will keep the mold in place when you use it.

Step 4: Add the Shorter Side Walls Next

After this, you should place the shorter sidewalls on their edges. Make sure they are next to the longer sides. Go through the same process with the shorter sides as you did with the longer side. Drill a few pilot holes. Then, add the screws. Make sure the screws are seated firmly to hold the concrete mold in place.

Step 5: Bevel the Corners

This is when you want to put on your gloves. Squirt a bead that is about half an inch in size of silicone caulk into every corner of the mold. After this, dip the ball bearing in some water. Draw the ball bearing down every caulked corner to make sure the curve is smooth.

Step 6: Clean Up Your Work by Removing Any Excess Caulk

Finally, wait for the silicone caulk to cure. Then, remove any excess silicone that may be in place. You may want to start by picking at the end of the strip with your fingernail. Then, pull any excess caulk away. Dispose of it safely.

Rely on a Professional Local Asphalt Company for Help Making a Concrete Mold

If this sounds like a complicated process, then you may want to reach out to a trained professional for assistance. With the help of an asphalt contractor, you can make sure that you do this job right the first time. If you do not have the right concrete mold, you may have a hard time finishing your project. Fortunately, there are professionals who have the training to make sure this process is performed correctly. You do not have to go through this alone. Do not hesitate to reach out to a professional for help.

What Type of Concrete Is Used for Driveways?

If you are thinking about adding a driveway or repairing your current one, then you are probably wondering what type of concrete is going to be used. The reality is that there are many different types and mixes of concrete. Therefore, the right mixture for one job might not be ideal for a different job. If you are thinking about installing a concrete driveway, then you need to consider the strength of the concrete, its air entrainment rating, its overall size, and even its slump rating. This is why it is a good idea to reach out to a concrete company for help. When it comes to concrete for your driveway, there are a few points to keep in mind.

The Characteristics That Define Concrete for a Driveway

If you are looking for concrete for your driveway, then you need to make sure that you find concrete that is going to be able to withstand the weight of vehicle traffic. Ideally, you need concrete that can stand up to 4,000 pounds per square inch for your driveway. During the cold winter, you also need to look for a concrete mix that has a six percent air-entrainment value. This will create small bubbles in the mix of concrete, providing water in the concrete a place to go when it freezes and expands.

In addition, in order to make the installation process easier, you need to think about the slump rating. Slump is a measurement of the workability and thickness of the concrete once it has been mix. You are looking for a slump rating of around 4 to 5 inches in order to make the installation process easier.

The Installation Process of Concrete for Driveways

Before your driveway can be poured, a contractor has to make sure that the site is prepared properly. This means providing a smooth, firm base upon which the concrete can be poured. Once the site has been formed properly, it is time to mix the concrete with water. Usually, ready-made concrete is used for concrete driveways because it meets many of the characteristics above. Once the mix is ready, the contractor will pour the wet concrete into the driveway, using shovels and rakes to ensure the concrete is laid out properly.

Once the concrete has been poured, it is going to be troweled and finished. This will make sure the final product looks appropriate. Finally, the concrete has to be cured as well. The curing process could last as long as 28 days, with the first few days being the most critical. This will harden the surface, allowing it to withstand the stress of routine foot and vehicle traffic. Then, the concrete driveway is finished.

Rely on an Experienced Concrete Company for Help Installing a Concrete Driveway

These are just a few of the most important points that you need to keep in mind if you are looking for concrete for your driveway. You need to make sure that you find the right concrete that is going to allow your driveway to withstand not only the elements but also routine vehicle traffic. Then, you need to find a contractor who understands the process of installing a concrete driveway. If you have a concrete project in the near future, you need to reach out to an experienced concrete company for help. That way, you can ensure that the project is completed properly the first time around.


The Differences Between Summer Asphalt and Winter Asphalt: Need To Knows

To the average person, and they look like pretty much all asphalt the same. After all, asphalt looks like a hard, black substance that is made from small rocks that have been stuck together using tar. At the same time, experts in the industry understand that asphalt comes in many shapes and forms. In order for people to find the right asphalt to meet their needs, they need to understand the differences between the types of asphalt. One of the biggest differences between different types of asphalt and all the time of year during which it is used. Two of the most popular types of asphalt are summer asphalt and winter asphalt. Those who are looking to get the most out of their asphalt need to trust an asphalt company to explain the differences to them.

An Overview of Summer Asphalt

First, it is important to highlight the summer asphalt. Usually, summer asphalt is available between April and December. In some places, this is also referred to as hot asphalt. This type of asphalt is used to pave certain areas such as long driveways, roads, and parking lots. Usually, this type of asphalt is next at around three hundred degrees Fahrenheit. It is also made during the summer, thus the name.

Hot asphalt has to remain at this temperature and has to be applied quickly after it is mixed. If this asphalt cools, it can be harder to lay. If this asphalt does end up cooling, it can be reheated; however, this will also impact its quality. Because this type of asphalt has to be applied on the ground that is both dry and warm, this is the most common type of asphalt available during the summer.

An Overview of Winter Asphalt

Next, it is important to talk about winter asphalt. Because most asphalt is laid during the summer, winter asphalt is usually reserved for patching repairs. Winter asphalt can be used to tackle situations involving potholes, cracks, and other common problems. When this type of asphalt is poured on the cooler ground that is present during the winter, it usually takes longer to cure. As a result, smaller batches are better. This is our winter asphalt can help.

Winter asphalt is usually available between the months of January and March. Furthermore, this type of asphalt does not need to be reheated constantly. Often, this makes it easier to use. Furthermore, winter asphalt can also be stored and used later if there are other patching issues that arise. As a result, winter asphalt has a wide array of applications; however, it is usually not used to pave large parking lots and long roads.

Trust the Expertise of an Experienced Asphalt Company

This is a brief overview of the similarities and differences between two common types of asphalt. If you have asphalt needs, then you need to make sure that you rely on the right type to help you with your issues. This is where the guidance of an experienced asphalt company can help. When you rely on a helpful asphalt company, you can rest easy knowing that you are going to end up with a high-quality product that has been built to last. Make sure that your asphalt is both durable and reliable.

7 Critical Checks for Parking Lot Drains

Business owners commonly think about cracks and damage that lead to asphalt repair; however, it is just as important to think about parking lot drains as well because parking lot repair can be expensive. Water is a good thing when it comes to parking lots; however, too much water can also lead to serious damage. Even shallow puddles can cause the surface to become slippery. Cars can lose control and collide with other vehicles, leading to both personal injuries and property damage. This can cause the reputation of the business to suffer. This is where it is important to check parking lot drainage, starting with the drains themselves.

Checking for Parking Lot Drainage: The Drains

Some of the most important items that need to be on this checklist regarding parking lot drains include:

Water Collection: First, take a look around the drain. Make sure there isn’t any water ponding around the drain. If water starts to pool around the drain, it will collect along the sides. As a result, pressure around the drain will start to increase. During the winter, this water will freeze. When water freezes, it expands. This will cause the drain and concrete to crack, leading to damage.

Flush with the Surface: All parking lot drains need to be flush with the asphalt surface. If it is not, this is a major concern. If the drain is not flush with the asphalt, this can cause water to pool. It can also lead to flooding.

Ring Popping Up: Another potential issue that people might notice with their parking lot drains is that the ring is popping up a little bit. In this case, a small asphalt patch can fix the issue. Just make sure the patch is level. This will prevent a collar from forming that will stop the water from draining correctly.

Inside: Be sure to check inside the drain as well. Take the time to look for gunk, foul smells, and debris. If there is a clog inside the drain, this can also lead to a mosquito nest, which is a major nuisance. To look inside the drain, test the drain by pouring water into it. It should drain properly.

Blockage: Of course, it is also important to make sure that parking lot drains are not blocked by either debris of vegetation. If the drain is blocked, water cannot reach it properly. This will lead to flooding.

Loose Material: Sometimes, there is loose material that forms around the drain. This could be sand, gravel, or other materials. This is a major problem if the drain is near a major road. This aggregate can be brought in by runoff and heavy rain. Ensure this is not accumulating within t the drain.

Pooling: Finally, look at the center of the parking lot. Does the water pool in this location? Parking lots usually slope from one end to the other to help water drain. If water is pooling in the center, this means the center of the parking lot has dropped, causing water to pool and preventing it from draining properly. This will require a parking lot repair.

These are the most important elements when it comes to checking parking lot drains. This is important for making sure that all moisture drains properly. It will prevent property damage from arising down the line and save people money on asphalt repair.